I’ll be updating this page throughout the year with tips and tricks. If you have a question or comment, check the page to see if it has already been added.
Last updated: 2021-08-20
Initial set up – set resolution
The first time you plug the TVs into your Macbook, you will need to set the resolution. Depending on the dongle you are using, you’ll have a flickering display or the text will be too small to read. Luckily, the fix is pretty easy, and once you’ve set it, the Macbook remembers it so you don’t have to do it again.
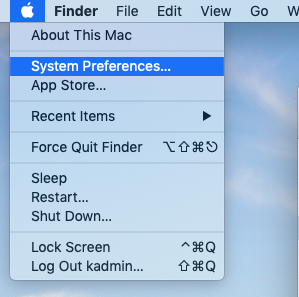
Open System Preferences
To open System Preferences, go up to the Apple Menu and select System Preferences.
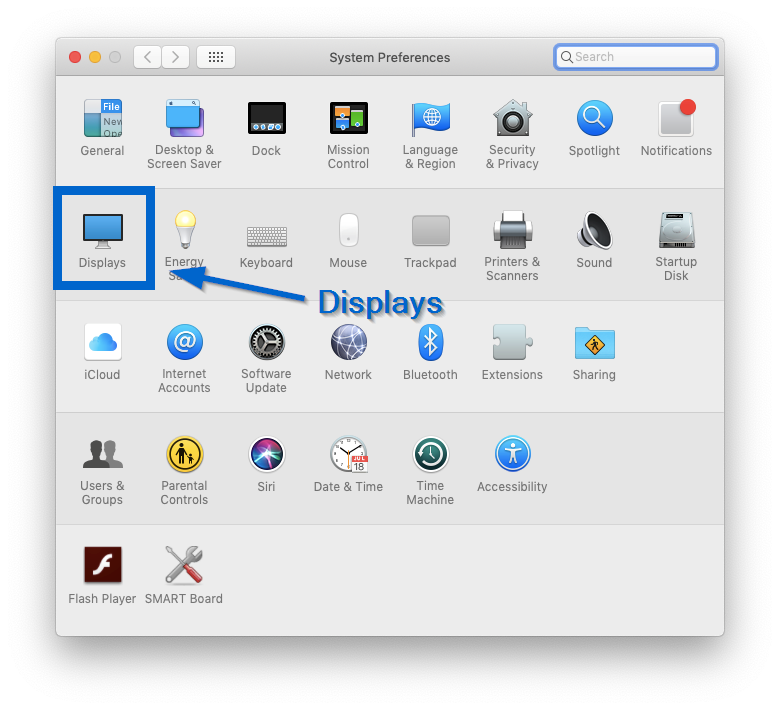
Open Displays
Click on the Displays icon.
Plug in the TV
Plug the HDMI cable from the TV into the dongle, and then plug the dongle into the Macbook. The screen will flicker, and it may keep on flickering. Depending on the dongle, the graphics may also get really small. Both of these issues will be fixed after we set the resolution.
Setting the resolution
Find the SAMSUNG display window that popped up after you plugged in the dongle. The preference window will look different depending on what dongle you have.
First way
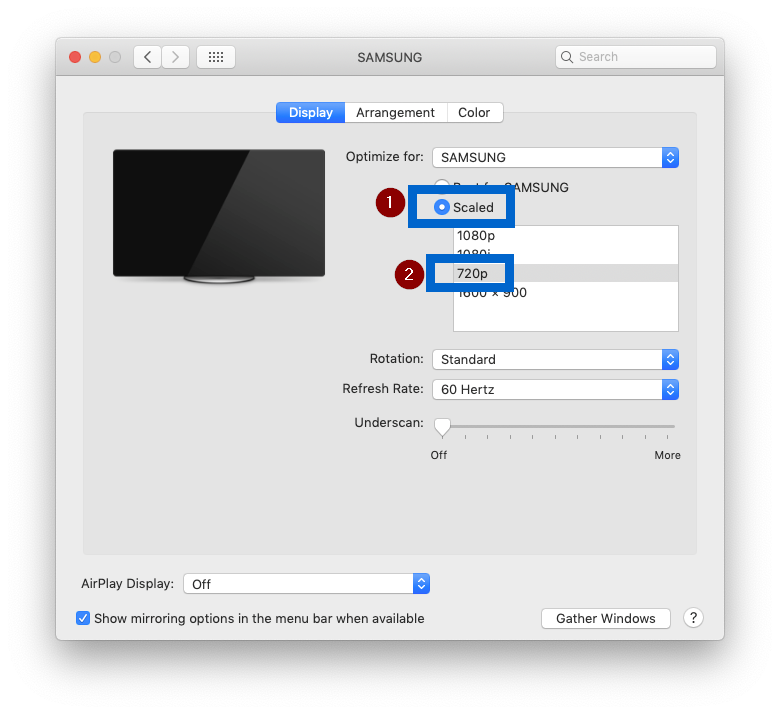
Second way
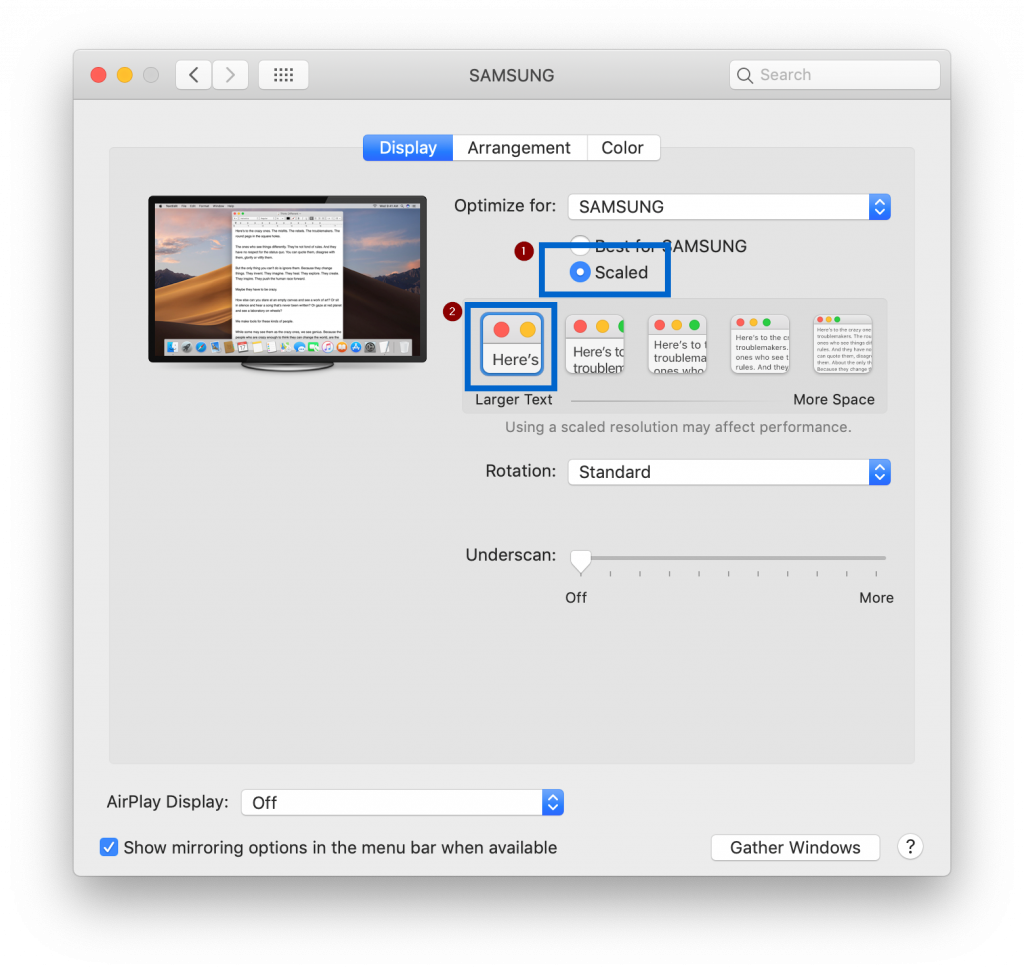
The screen will now have a rock solid image and be readable by people across the room. Also, this setting will be remembered so you won’t have to go through these steps every time you plug in the TV to your laptop.
Advanced
Zooming text
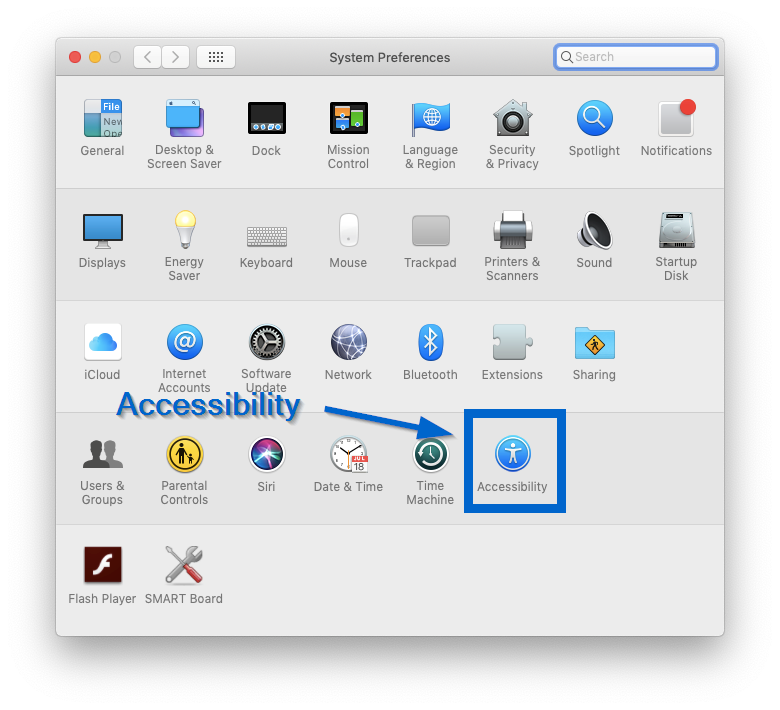
Even with the resolution set at 720p there will be times when you wish you could zoom in on a particular area. You can do this with the Zoom feature in Accessibility. To set it up, open up System Preferences (directions above) and click on Accessibility.
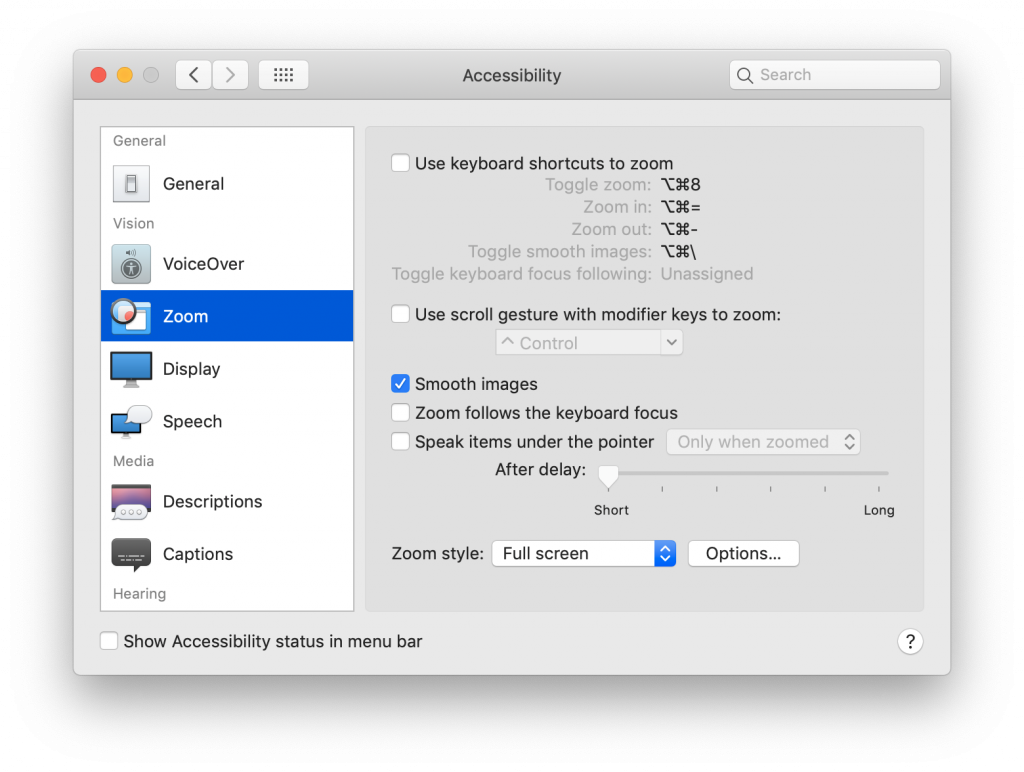
Click on Zoom on the left side.
In the middle of the window on the right side, check Use scroll gesture with modifier keys to zoom:
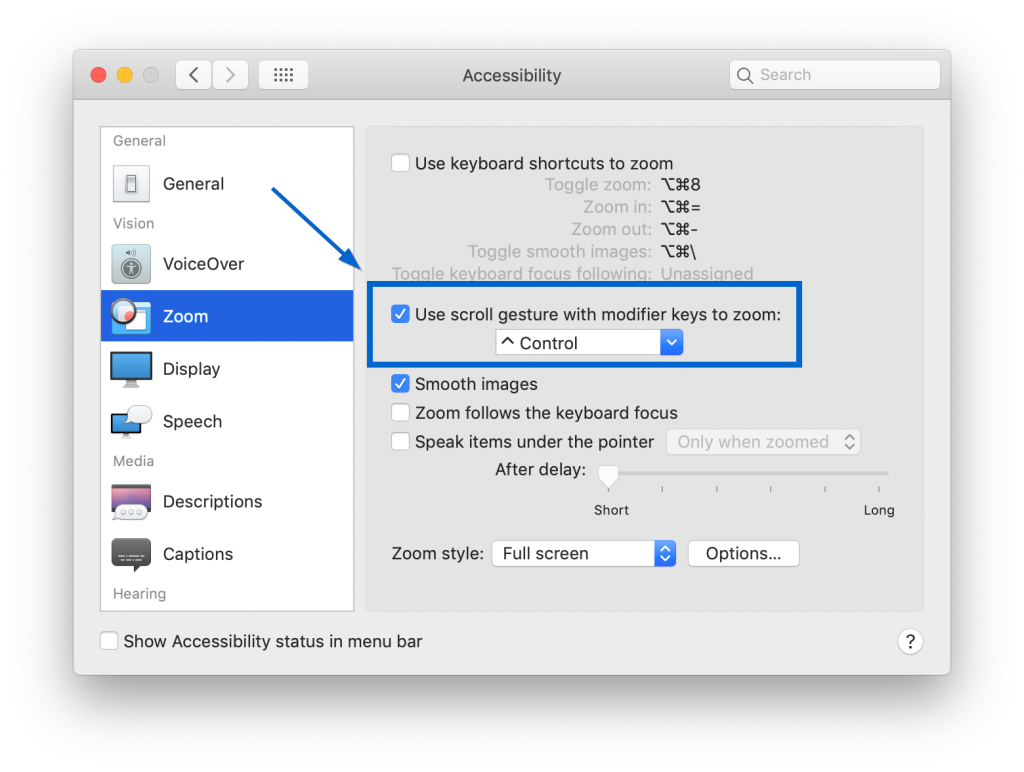
Now you can hold down the control key and use two fingers on the trackpad. Moving two fingers on the trackpad while holding down control will zoom the screen in or out.